Tips How To Organize Cans In A Deep Small Pantry

My pantry is small and deep I have always been looking for improvements. Most difficult was how to organize cans in my pantry. I tried tiered shelves for canned goods, baskets, lazy Suzan and nothing worked well to organize my canned food. I came with the idea to make my own canned food organized shelves and love it! So easy access to any of my cans, good visibility and so convenient to see which of cans I should use at first. It was simple to make the changes and I used my old shelves. I did this pantry improvement myself and am so proud! I use my shelves for a few months now and we love them! Of course, every pantry is different, my is 29″ wide and 23″ deep. I am sure, you can implement this idea in any deep pantry with wooden shelves as I did. Check out my idea and it may work for your pantry too.
Tools I Used
Just a few small nails
Hammer
Saw
*Saw is not necessary, Lowes or Homedepot associates can do cuts for you.
**Instead of nails and hammer can be used liquid nails.
- On the photo above the shelf before improvement.

*My original shelves are narrow as you can see in the photo and the pantry is deep enough to make improvements. How to make the wooden shelf wider without changing the whole shelf? I want an inexpensive solution to make improvements. My solution to making the shelf wider is to add a 1 1/2″ strip of wood on the back of the shelf. I know, it sounds not much of an improvement but it helps to fit some boxes much better than before. Of course, how deep should your pantry shelves be depended on many different factors. The most important is our personal preference.
The extension strips are not noticeable on the bottom and I covered shelves with sticky paper on the top. Works so well and I did the extensions to my shelves in other closets in my house too.

2. I removed the shelf and on the back place a 1 1/2 inches strip.
*I didn’t attach strips to the shelf holder by anything and we don’t have to. It stays in place so well.

3. I place the shelf on the top and now my shelf is under angle. The cans on the top will be always rolling towards the bottom when I remove a can.

4. To make another extension I used a 5 1/2 inches wooden strip. To stop my cans from rolling out of the shelf I add the border. To make my border I used 1/2″ wide and 1 1/4″ high wooden cabinet trim molding. I attached the molding with a few nails. We can also use glue instead of nails but I don’t know how well it will work for this task and choose nails instead.

5. I place the shelf’s extension and it laying horizontal in the relation to the main shelf and my pantry shelves for cans almost ready.

I added the stoppers on each side on the top of the holders (5 1/2 inches long). I made it out of the same strip I used to lift the shelf. When I was making my shelf and I was not sure it stays together well, so add these stoppers. It is not necessary, the shelf stays stable without it.

6. The shelves I covered with shelf liner and it help to keep two parts of the shelf together. The shelves look like one piece now and using shelf liner is the best way how to protect pantry shelves. This is the best way so far how to organize my small pantry with deep shelves, the angle increased visibility for my cans on the shelves and so easy to keep up with inventory.
*I used EasyLiner adhesive laminate 20 in x 15 ft shelf liner by Duck brand. I bought it in Walmart. My design is Sky Gingham. Wallmart has so many other cute designs as well. The liner is so easy to put up for resurfacing shelves. It is removable and easy to change if need it.

I have 2 pantry shelves for cans and am very happy with the improvement!
I put on the back newer date expiration cans and use at first cans closer to me. I don’t have to label the places for my cans because it is clear visually where I need to put my canned corn, canned beans, and other canned food.
*The best way to organize the cans, by the expiration date, not by the date you buy them at the store. I placed my cans at the back of my shelf after I came from the store because thought the expiration should be later than I have already cans. It is not always this way. Actually, good practice to check the expiration date every time we buy any food, in my opinion.

I tried a few methods to organize my canned food before I made my shelves for cans in my pantry. Sharing my personal experience.
1
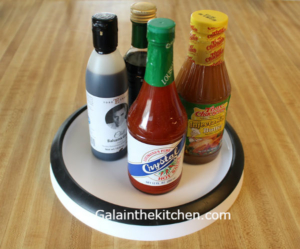
 Lazy Suzan is nice to have and I use a few in my kitchen. However, it didn’t work to improve my pantry shelves for cans. The reasons are I can’t place many cans on it and can’t able use space around it to place cans. So, if I place cans on the shelf without the turntable, I fit so much more.
2
I used 2 large baskets on one shelf. I was able to place so many cans in and was ok. But not easy to keep inventory and they are so heavy to take them out with cans.
3
Tiered shelves for canned goods worked ok but an inconvenience to rich the back of the shelves.
I have tested the shelves for canned products over the year now and love it! It is a great solution for my small pantry.

⇓ Check Out My Lates Pages ⇓

 Recommended ⇒ My 5 Useful Tips How To Organize A Small Chest Freezer
 Recommended ⇒ Tips Make Easy Cleaning Kitchen Gadgets and Appliances

 @Galainthekitchen.com

 @Galainthekitchen.com
Leave a Reply
Want to join the discussion?Feel free to contribute!