
Gala’s 8 Layer Russian Honey Cake Medovik Recipe
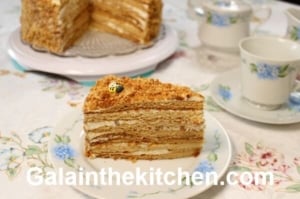
Russian honey cake, called Medovik, is a delicious layered cake. The frosting is not very sweet, and the flavor is well balanced. I tried so many recipes and techniques to make this cake, and it is my favorite version so far for many years. I can say it is a classic Medovik recipe. However, I make my cake slightly different from most recipes, and trust me – It is Delicious! This Medovik recipe is for an 8-layer (9-inch) round honey cake. In the photo above, the cake is after a night in the refrigerator. Learn how to bake delicious, authentic 8-layer Russian Honey Cake Medovik.
My son was working in the crew on the movie, the Netflix holiday romantic comedy “A Christmas King of Love”, which was filmed in Slidell, Louisiana. He asked me to make my homemade honey cake, Medovik, for his coworkers. So, if you are a person who has tried my cake and asked for the recipe, this is my Medovik cake recipe, and I am sharing it as I promised!

*At the bottom of the page, I have a few pieces of advice and easy decor ideas for this cake, of course, with many photos:)
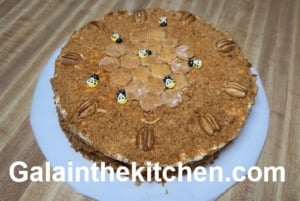
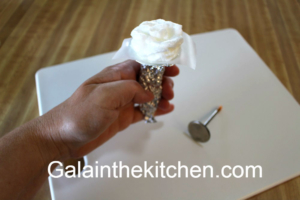
Medovik Layers Ingredients:
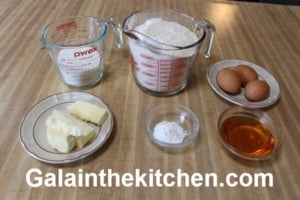
- 1. 100g unsalted butter
2. 200g sugar
3. 10g soda (2 tsp)
4. 130g honey (Orange blossom)
5. 3 eggs
6. Pinch of salt
7. 600g sifted all-purpose flour
*Just a touch of salt improves the taste of any pastry.
What Type of Honey is Best for Medovik Cake Recipe?
The best honey to use for Medovik cake is orange blossom honey because it has a unique, pleasant, mild flavor. We can also use wildflower, acacia, or clover honey because they have a mild flavor too.
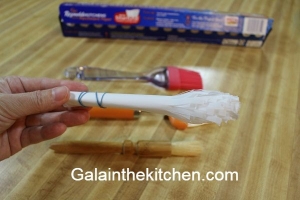 Recommended ⇒ 9 Substitutes Ideas For Baking Tools And Equipment
Cake Dough Preparation
I suggest making dough in a double boiler, not directly on the stove. The reason is that the honey caramelizes gently without scorching. I tried both ways, and a double boiler is the best way to make Medovik cake dough.
* A double boiler is a pot-in-a-pot cooking method. The bottom pot has boiling water; the top pot doesn’t touch the water and has the ingredients. This way, the dough cooks gently.

- Add all ingredients to the top pot except flour. Stirring constantly, the ingredients will be well incorporated. The dough will become foamy.
*For the best foaming reaction, use real honey. Genuine honey reacts with baking soda because of its natural acidity, helping create a lighter, more tender honey cake.

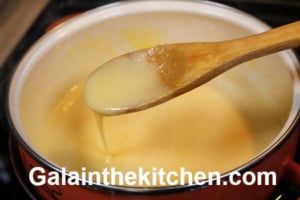
2. Add a few tablespoons of flour each time and start mixing it in gradually in a pot. Don’t remove it from the pot yet; remember it is hot. The dough is warm enough to touch; take it out of the pot onto a baking mat.
*Leave out a little flour to dust the layers for rolling. Don’t use more flour than in the recipe.

3. Place the dough on the baking mat and start lightly kneading. We just need the dough to be incorporated. It may be sticky at first.
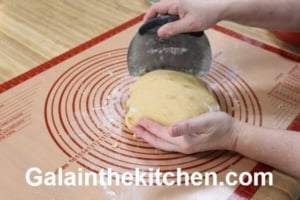
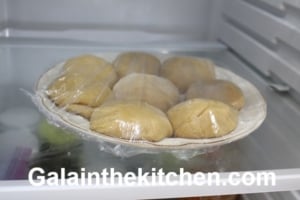
4. Divide the dough into 8 pieces, cover with plastic, and refrigerate for 1 hour. We need our dough to cool off.
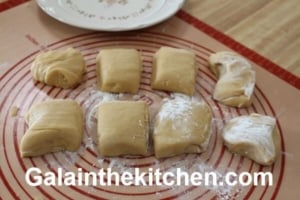
Start Preheat Oven to 360°F (180°C)
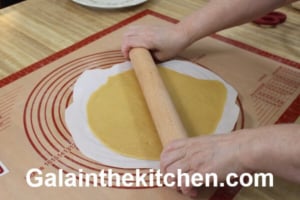
5. Roll each layer of dough on dusted with flour baking paper larger than 9 inches. It doesn’t need to be perfectly round because we are going to cut it after baking.
*If the dough is too sticky and you can roll it easily between 2 layers of baking paper. When you remove the paper, the dough sticks to the top of the paper when you peel it away. Don’t worry! Instead of pulling the parchment straight up, gently lift one edge and peel it back slowly, keeping the paper as close to the surface of the dough as possible. This simple technique helps release the dough without tearing it.
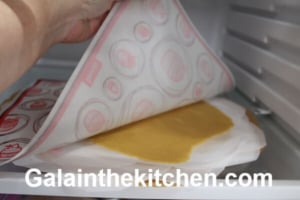
6. Place the layers with baking paper in the refrigerator and cover them. Make all layers before baking because they bake so fast.
7. Pierce with a fork to prevent puffing up in the oven. Bake at 360°F for 7 minutes each, or until lightly caramelized.

8. Cut out the finished round.
*Crushed cutout pieces are going to be used to cover the cake.
**I like to cut out the final round shape after baking. The reason on the sides will be spongy after cutting and absorb frosting on the sides.

How to Simplify Medovik Honey Cake Before the Holidays – Make Cake Layers Ahead of Time
-
Refrigerate (Up to 1 Week): Bake your layers ahead of time and store them in airtight bags in the fridge until you’re ready to assemble the cake.
-
Freeze (Up to 3 Months): Wrap the cooled layers securely and freeze them in a heavy-duty freezer bag for up to 3 months.
When ready to prepare the cake, simply prepare frosting, thaw the layers, and assemble your cake effortlessly!
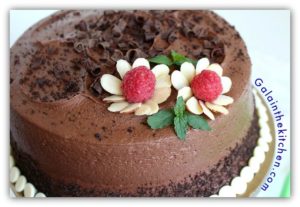 Recommended ⇒ 4 Cute Raspberry Garnish Ideas With Photos
Medovik Frosting Ingredients:
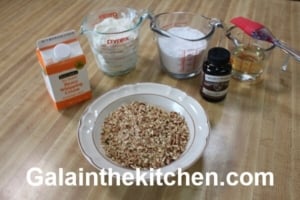
1. 500g sour cream without liquid (I use the Daisy brand)
2. 200g powdered sugar
3. 500g heavy cream
4. 1 teaspoon vanilla
5. Toasted chopped pecans (optional)
6. 1 1/2 cups Moscato wine (optional)
*Cake is tasty without pecans and Moscato, but these 2 ingredients make it so much better!
* Nielsen-Massey Pure Vanilla Bean Paste
Pecan Preparation
Toast pecans to enhance flavor and chop.
Moscato Soak Preparation
Boil on medium heat 1 1/2 cups Moscato for 15 minutes so the alcohol evaporates and flavors intensify. After boiling, approximately 1 cup should be left; it will be more than enough. I like to use Moscato wine because it has a sweet and sour taste. However, wine can vary, so depending on its taste, you might need to add a touch of lemon juice and sugar. Taste the wine after boiling and adjust the taste.
- Place sour cream, powdered sugar, cream, and vanilla in a mixing bowl. Start on low speed for 2 minutes and then increase the speed.
*Place the powdered sugar in a mixing bowl between the sour cream and cream. The reason is that if the powder is on top of the liquids, it starts flying all over.
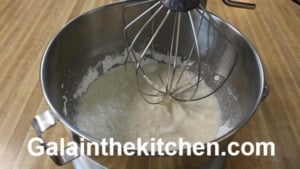
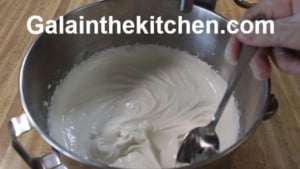
2. If you start to see lines in the mixture from the mixer wire whip, the frosting is ready.
*Test it with a spoon; if the spoon leaves a trace that stays on the surface, the frosting is done.
 Recommended ⇒ 7 Cute Apricot And Peach Garnish Ideas
Assembling Medovik:
Brush or sprinkle Moscato generously on each layer, spread frosting, and sprinkle with pecans. Repeat on each layer.
* It is a recipe for 8 layers. One layer I often use for decor cutouts with cookie cutters. A cake with 7 layers will still be tall enough for presentation.
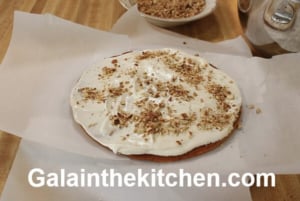
Spread frosting on the top and sides. Sprinkle with crumbles from the layers’ leftovers.
*I use paper on the bottom for easy cleanup from crumbles and frosting. More details here ⇒ 11 Ways How I Use Wax Paper in My Kitchen
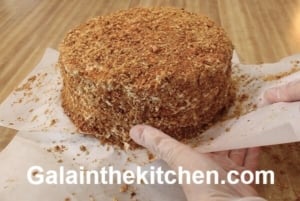
For the best taste, refrigerate the cake 8-12 hours before serving.
How to Store Medovik Cake
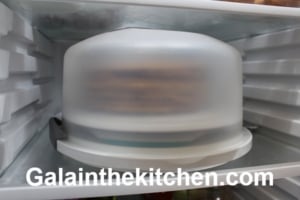
Store in the refrigerator for up to 3 days. The best way to store Medovik is in a cake carrier—it keeps the cake from absorbing other fridge odors and makes it easy to transport. If you don’t have a carrier, you can cover it with a large mixing bowl.
*Another way to keep Medovik for a party is catering trays. This way, people don’t have to return your cake carrier. Check out the photo below from Easter, where I used a catering tray with a lid so no one had to worry about returning a container.
**We can also use a large plastic container, but use it upside down. Place the cake on the lid and cover with the container. In the photo below, I use this idea for Easy Sushi Salad Cake Philadelphia Recipe With Decor Ideas


Can Medovik Cake Be Freezed?
Yes, this Medovik can be frozen for up to 3 months. I froze a few small pieces once, and it’s delicious! Usually, I don’t have leftovers to freeze.
Decorating Honey Cake Medovik Ideas:
Cutouts from one layer are the easiest Medovik decor. Here are some honey cake ideas for decorating.
Decorating Medovik for Christmas
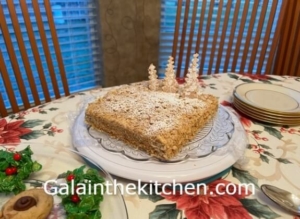
I made these trees with a crinkle cutter and dust with sugar powder. Sugar powder looks like snow on trees.
Read more about ⇒ 13 Ideas for Using a Crinkle Cutter To Garnish Food
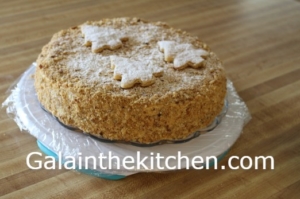
I made these 3 trees in the photo above with a cookie cutter.

Decorating Medovik for Fall
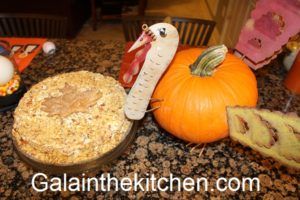
I use a leaf pancake mold pan to make my leaf for the fall holiday, Thanksgiving.
*You can make a print of the leaf and use it as the pattern to cut out the leaf shape.
 Recommended ⇒ 3 Easy Ways How To Make Flowers Out Of Marshmallows
Decorating Medovik Cake for Valentine’s Day

Russian Honey Cake
I decorated these honey cakes using strawberries.
Check the easy strawberry hearts and rose techniques ⇒ 9 Easy Strawberry Garnish Ideas
*If you want to make a heart cut-out and don’t have a cookie cutter. Check how we can make an easy heart cookie cutter without a seam from a plastic bottle ⇒ 5 Easy DIY Cookie Cutter Ideas Out of a Plastic Bottle

Decorating Medovik Cake for Easter
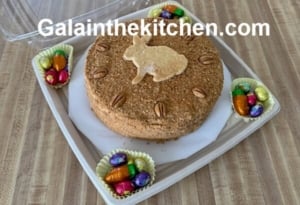
These are two of 3 cakes I made for my son’s coworkers. The Easter decor was because we were close to Easter time, and the fleur-de-lis symbolizes Louisiana.
* For the base of the cake, I used a cake round board, which was covered with baking paper.

Decorating Medovik Cake for Summer
These marshmallow flower decorations work beautifully on Medovik. Marshmallow is delicious as a topping for most desserts.
Here are 3 easy techniques for making marshmallow flowers ⇒ 3 Easy Ways How To Make Flowers Out Of Marshmallows
 Recommended ⇒ Fun And Fancy Cocktail Garnish Ideas With Photos

⇓ Check Out My Other Recipes ⇓

 @Galainthekitchen.com
 @Galainthekitchen.com
 @Galainthekitchen.com



Leave a Reply
Want to join the discussion?Feel free to contribute!