
7 Ways How To Wrap Homemade Caramel Candies
Homemade caramel candies are a great gift for someone special. However, we can’t just make delicious treats and put them in a bag, caramels simply stick to each other and will be not presentable. We need to wrap candies individually. How to wrap homemade caramel, taffy, tootsie rolls, taffy, chocolates , or other hard candies individually on a budget? Use just what you have in your pantry. Wax paper, baking paper, and freezer paper are what papers we can use for candy wrappers, candies don’t stick to these papers. However, each has its own advantage. Wax paper is less expensive to use but it is more fragile than baking paper. Baking paper is stronger, has two varieties in color and every household has it, so for some people, it is a better option. A big advantage of freezer paper is the ability to attach labels. Labels don’t stay well on wax and are impossible to stick to baking paper. Freezer paper has 2 sides – plastic size is great to cover candy and they don’t stick to it and the paper side is great to place the label. In the photo below I decorated candies with fall theme stickers.
Many fancy candies wrappings papers we can find on the market but the holiday season involves so many expenses, especially Christmas candy wraps! In my opinion, the best use is what every family has in the pantry or we can fund in any of our local grocery stores. If we buy wax paper just for wrapping candies and for some reason not making candies, we always can use it for other purposes. Just keep in mind when shopping for candy wrapping paper, paper in contact with candy should be food-grade paper. We can also use other nonfood grade papers as well if we wrap the candy in fine wax paper first and the candy is not in direct contact with decorative papers. The example photos you can see below on the page. We can use also some baking supplies to wrap candies. Baking cup liners are perfect caramel wrappers if we cut candies into 1-inch squares. Baking cups are so easy to use but do work well not for every shape and size of candies. I have on the page a few options for homemade candy wrapping ideas in different shapes with photos, check them out.
Check out 7 methods how to wrap handmade candies:
- Traditional candy wrapping.
- Old fashion candy wrapping.
- Gift candy wrapping.
- Flower candy wrapping.
- Candy wrapping in the shape of fish (easy)
- Turkey-shaped candy wrap (For kid’s craft)
- Candy wrap out of parchment paper baking cups (easy and no pattern to make).
- Fish shape candy wrapping from paper baking cups (no cutting and easy).
Tip How To Make Pattern For Candy Wrap
The best way is to make a candy wrapping pattern first if you use baking, wax, or freezer paper. The sample helps to fund the right and desirable size for your candy. Unwrap the sample of candy and then cut as many wrappers as you need at this size. Parchment paper, freezer paper, and wax paper can be of different qualities, so making the pattern helps also to choose the right candy wrapping method.
 Recommended ⇒ 7 Easy Ways To Make A Treat Box From Disposable Cup
1. Traditional Candy Wrap
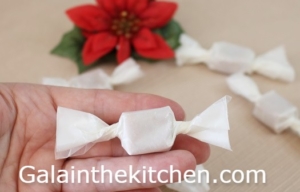
A traditional and most common method to wrap homemade caramels is twisted on the sides. The simplest way to wrap homemade candies! We can use it to wrap candies in wax paper, baking paper, or freezer paper as well. Candies as you can see in the photos look great in any of these paper wraps I mentioned above.
Technique 1
1. Place candy on the bottom of the paper.
2. Roll the candy into the roll.

3. Twist on one side in opposite direction than on the other side.
The traditional and most common candy wrap is the fastest way to wrap many candies. However, as I said already each wrapping candies method has its own advantages. Some methods you may choose are to keep kids busy and be more creative.

 Recommended ⇒ 11 Ways How I Use Wax Paper In My Kitchen
Wrapping Candy In Freezer Paper
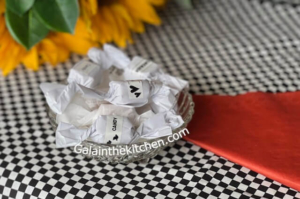
Freezer paper is great if you are going to decorate your candies with stickers. In the photo below I make labels with my electronic labeling system Brother P-touch and they stick perfectly to freezer paper candy wraps. Of course, colorful stickers make candies more attractive look. Check out the fall stickers photo below in old fashion candy wrap method.
The Best Way To Wrap Candy In Any Paper
We can wrap candy on any paper as long as we wrap it first in paper so that the candy will not stick to it. The best for this purpose is wax paper because it is very flexible and thin. So many different papers we can use to make a more colorful wrap for our homemade candies. I use on the photos small beverage napkins as my candy wrappers. We can make 4 wraps for candies out of one napkin. If we wrap directly caramels in it, the candies stick to it. The solution is to wrap it in 2 combination papers. Wax paper directly to candy and outside we can use any other colorful paper. This technique gives us more choices about what paper to use for candy wrappers. For example, we can use craft paper, Holiday wrapping paper, colorful foil, and much more.
Technique How To Wrap Candy In Any Paper
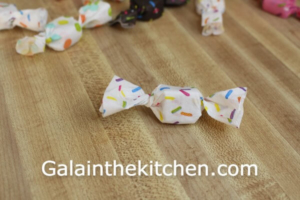
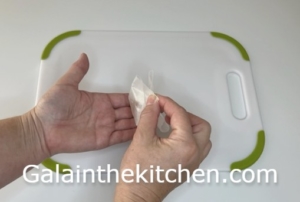
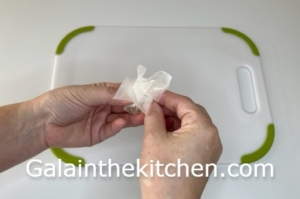
1. I choose colorful beverage napkins. My napkins have cake sprinkles on them and I have 3 variations of colors. The size of my napkins is 5 inches X 5 inches when folded in 4.

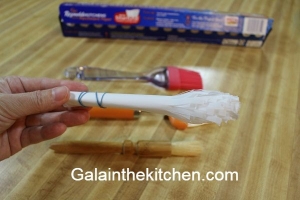
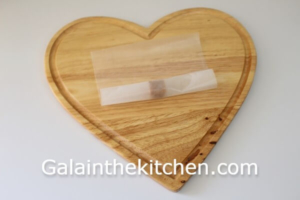
2. I cut stripes out of wax paper 1 inch wide, so it covers the candy. My wax paper stripe is around 4 inches. I place the wax strip on a napkin slightly out of as in the photo. It helps to wrap candy completely in wax paper and the napkin is not going to touch the candy.
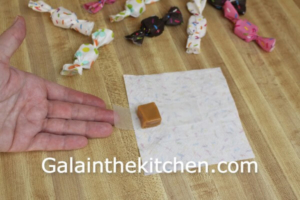
3. As you can see in the photo, the wax paper around the candy before we start wrapping it in a napkin.

Then wrap the candy completely and twist the ends in different directions. The candy wrap made out of napkin is so colorful and most important with this technique, our candy does not stick to wrapping paper.
 Recommended ⇒ 11 Ways To Use Baking Parchment Paper
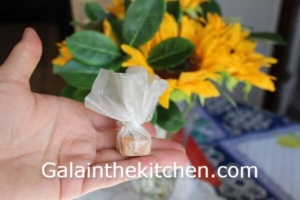
2. Gift Candy Wrap
The caramel wrapped with this method looks to me like a gift wrap. A great technique to wrap candies with any paper. This method is a great alternative to traditional candy wrapping. A not very common wrapping method for homemade candies. However, if you are going to add additional decor to candy, we don’t have to do twice as much for traditional candy wrapping. The example, I have with craft pipe cleaners on the bottom of this technique.
 Recommended ⇒ DIY Christmas Gift Bag Ideas for Under $1
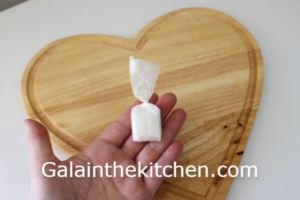
Technique 2
- Place candy in the middle and roll out from the bottom.
2. Then roll from the side.


3. Twist the same direction how you roll the paper. If you do the opposite way twist, very possible to tear the paper on the top.
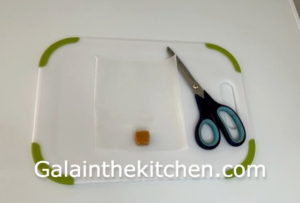
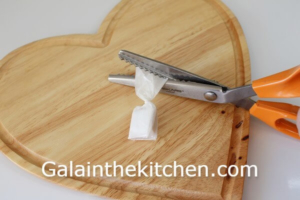
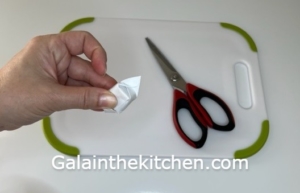
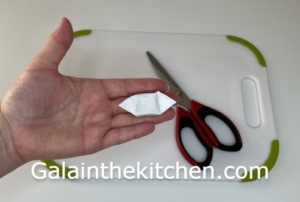
If you like candy with a zigzag on the top, you can use pinking shears. The shears have sawtoothed blades. With these shears, we can cut a nice zigzag pattern.
To add some color we can add to the wrapped candy chenille stem or also call craft pipe cleaners. If you going to use a chenille stem, make sure you bend over sharp ends. The reason chenille is made out of wire and the ends are sharp. Oh, so cute!
 Recommended ⇒ 13 Ways To Use Aluminium Foil In The Kitchen
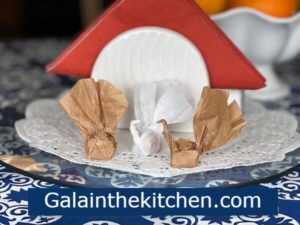
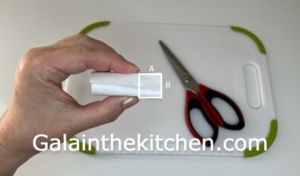
3. Old Fashion Candy Wrapping
This wrap I can call old fashion because this is the most common candy wrap after traditional wrap. I remember from my childhood, most chocolate candies were wrapped this way. By time-wise it takes much more time than traditional but I am sure kids going to like to wrap candies with different methods. Old fashion candy wrap is the best candy wrap if we attach stickers or drove design on it, in my opinion. Any paper works great to wrap homemade candies with this method.
*If you do use not food-proof paper, wrap fist the candy in wax paper as I mention in the napkin technique above.
Technique 3
- Very important to make the right pattern. In the photo below, you can see the above and the bottom of the caramel distance is the same as the candy width.

2. After we roll the candy into paper, the A size should be equal to the B size.
3. Tuck the bottom of the candy wrap on one end as in the photo.
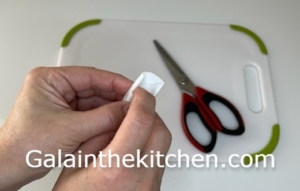
4. Fold one side and then fold on the top of another side. Do on the other side of the candy the same.

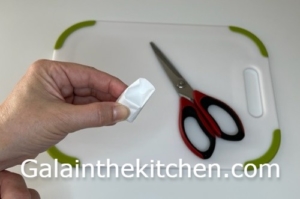
The candy is ready to give someone special!
If we use freezer paper we can decorate it with stickers to make it more colorful!
 Recommended ⇒ How to Put Paper Napkins in a Napkin Holder 5 Fancy Ways
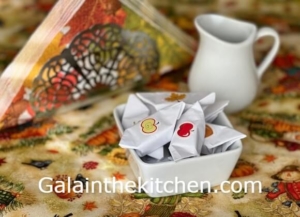
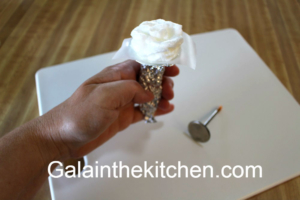
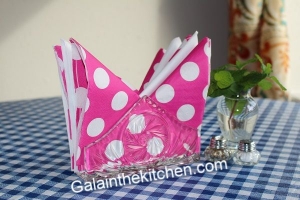
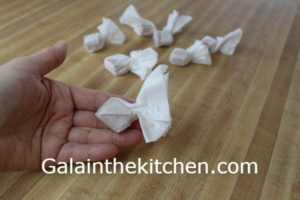
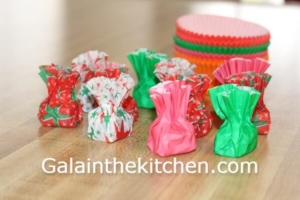
4. Caramel Candy Wrap In Flower Shape
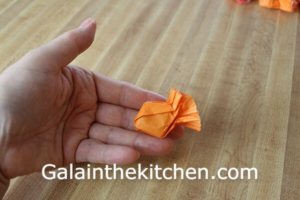
I call this method flower shape candy wrapping. The presentation is very impressive and we need much fewer candies to fill the jar or bag. I like to use wax paper or baking paper for this method. The freezer paper is too thick and not a great choice for this method. This method is one of the best for round shape candies and large size candy or other sweets.
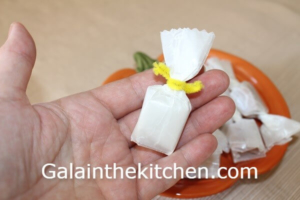
Technique 4
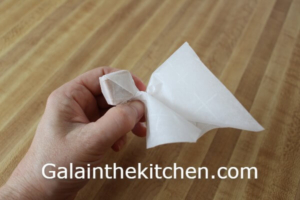
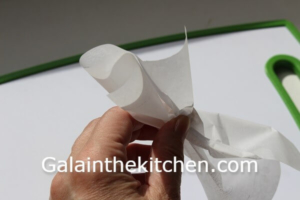
- Cut square and place candy in the middle of the paper.

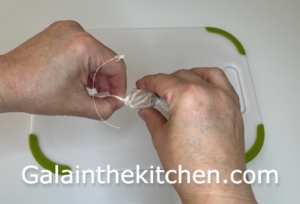
2. All 4 corners are put together on the top of the candy.
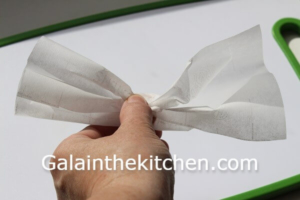
3. Hold the bottom in one hand and twist the top to lock the candy with another hand.
This candy wrap is so cute!
5. How To Wrap Homemade Candies In Parchment Baking Paper In The Shape Of Fish
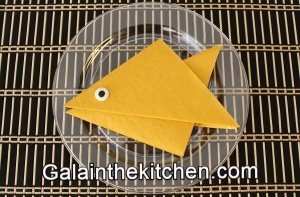
The candy wrapping in the shape of a fish technique is so cute, easy, and definitely different from what you can find on the Internet. I come out with this technique because the 1-inch by 1-inch caramel candy makes a great fish body in my mind and I tried it. You can try other shapes of candies and limit only your imagination. Look how cute my fish-shaped candies are!
* Make the pattern first, wrap the candy, and unwrap. If the pattern works great, cut the baking paper as much as you need. We can also use other papers as well but from the papers, I had in my pantry at the moment, my baking paper was the best. Wax paper tears out easily and freezer paper to rigid to fold.
Technique 7
- Make sure you have the nose of the fish (candy) upfront as I show in the photo. It is important because this way our candy will look like a fish.

2. Fold the top of the baking paper as I show in the photo, then turn around the candy and do the same on the other side of the candy wrap. If we just twist the top, the candy looks will be not so much like a fish.

3. Twist or press the baking paper and the candy looks like a fish.
*If the paper is rigid enough we can just press and the candy is wrapped. However, baking papers have different qualities, and some need to be twisted to hold the candy shape.
If we turn the candy to the other side, it will be the same look. Make sure you check another technique to wrap candies in baking cup liners in the shape of fish. To wrap in baking cups we don’t need to make a pattern.
 Recommended ⇒ 5 Easy Fish Shape Paper Napkin Folding Ideas
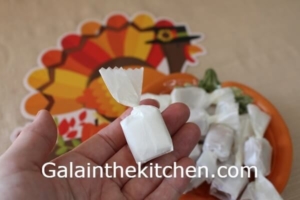
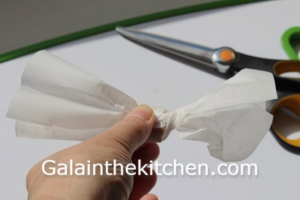
6. Turkey Candy Wrapping Idea
Simple Thanksgiving craft for kids idea how to wrap homemade candy in the turkey shape. The best result is to use baking paper. My wax paper was too thin to hold the shape well and the freezer paper is too thick to make my birds. However, papers can be of different qualities and they may work for you. The technique is very easy and brings a lot of fun for kids, especially for Thanksgiving candy-making process!
Recommended ⇒![]() How To Make a Cheese Ball Into Turkey (Easy!)
How To Make a Cheese Ball Into Turkey (Easy!)
Technique 5
- I cut approximately 9 inches by 9 inches of baking paper.

2. Press the left side together to make a turkey’s tail. Don’t twist it.
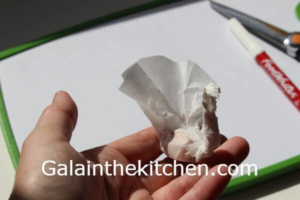
3. To make the neck and head my turkey I twisted paper to look like a rope.
*Most of the time I have more than I need paper for the neck. I untwisted the neck and cut off some paper inside, then again twisted it back, so the turkey neck is thin as I wanted.
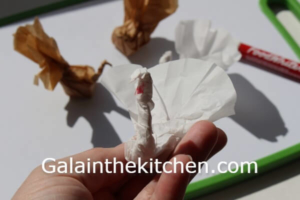
4. Make the turkey head by folding the top down.

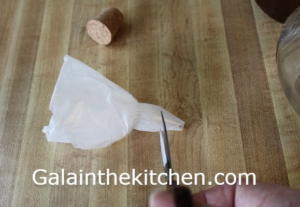
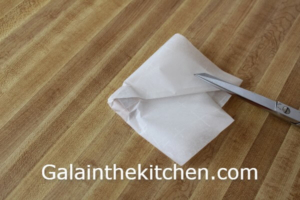
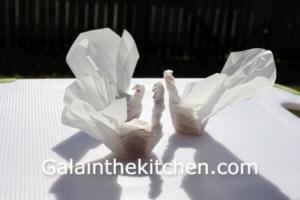
5. To make the turkey tail more realistic, I cut it in a round shape with scissors.
We can add red toms or gobblers with a red marker as I did in the photo below. I use an edible red food marker.
*If you have edible markers, use them on food-related crafts ⇒ 5 Ways I Use Edible Ink Food Coloring Markers To Draw On Foods
To make Thanksgiving candy wrap for homemade candies is so much fun for kids! This way we can involve kids in candy making process.
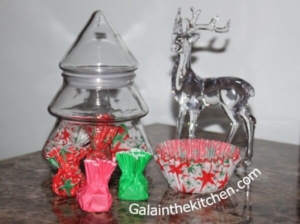
7. How To Wrap Homemade Candies In Parchment Paper Baked Cups Liners For Cupcakes
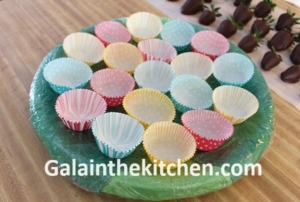
The technique to wrap your own candy in a baking liner for cupcakes or muffins is super easy if you do baking and have baking liners for cupcakes on hand. I come out with this idea and was surprised at how great it works. This is one more way how to use cupcakes baking cup liners in the kitchen. Unusual candy wrappers but work great for hard candies 1 inch in size! They are food-proof paper and rigid enough to hold the shape. Cupcake liners made out of parchment paper don’t stick to candy and it is another advantage to use baking cups as candy wrap. However, some baking cups still stick because of the quality. I wrapped a few candies in different baking cups to make sure the technique really works well before sharing the idea with you. My advice is better to try one candy and see if it sticks to your cupcake liner or not. If candy sticks to your cupcake liner, wrap the candy first in wax paper. I have Christmas-themed baking cups in the photos but so many different colorful designs of baking cups on the market for any Holiday season. So if we look for different candy wrapping paper designs, we can find the right one!
 Recommended ⇒ 5 Clever Uses for Paper Cupcake Liners Besides Baking
Technique 6
- Place candy in the cupcake baking cup liner.
2. Press the liner as shown in the photo and the candy is wrapped. So easy!

My Christmas candy wrapping idea is so cute and easy! Cupcakes baking cup liners great choice if you look at how you wrap candy at home easily for Christmas.
 Recommended ⇒ 5 Easy DIY Cookie Cutters Ideas Out Of Plastic Bottle
8. How To Wrap Homemade Candies In Baked Cups Liners For Cupcakes In The Shape Of Fish

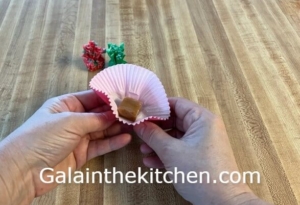
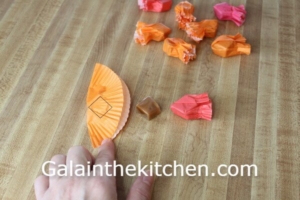
I wrapped candies in a baking liner for cupcakes in the shape of fish and liked them so much, so want to share the technique with you! This technique works great for 1-inch square candies. We don’t need any pattern to make. Baking cups are so perfect to wrap candies in the shape of fish. I had orange and pink baking cups but you can find so many different and bright colors of baking cup liners on the market. So your candies in the shape of fish are more colorful like saltwater fish in the ocean.
Technique 7
- Place candy in the cupcake baking cup liner. Make sure you have the corner of the candy up front as I show in the photo. This way our fish has a face.
2. Fold the top as I show in the photo, then turn around the candy and do the same on the other side of the candy wrap. This way our candy wrap doesn’t have wrinkles and it looks more like fish.
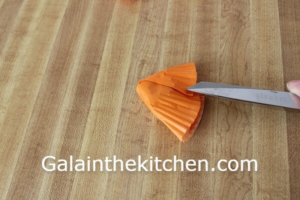
3. Make a fish tail by pressing the cup with 2 hands at the same time.

The fish has the same look on both sides.
Fish-shaped individually wrapped candies in baking cup liners are so a cute and easy idea!

 Recommended ⇒ 5 Easy Ways How To Make Boat Out Of Paper Napkin

⇓ Check Out My Other Recipes ⇓

 @Galainthekitchen.com
 @Galainthekitchen.com


 @Galainthekitchen.com
Leave a Reply
Want to join the discussion?Feel free to contribute!