5 Easy And Quick DIY Party Favors Boxes From Disposable Cup

A great and easy way to make easy homemade small gift boxes from disposable cups. Paper or plastic cups are great containers for gifts or party favors because made out of food-grade materials, are colorful, and are easy to match any themed party. If you are asking yourself,” What can I use as a cookie box?” One of the perfect solutions is a disposable cup! Just add a lid and decor for the cup and it makes a cute and fun presentation for any food treats. It will be fun and budget-friendly to do for kids. I like easy projects, so I am going to share easy DIY gift box ideas out of disposable cups.
On page 6 methods of how to make easy favors boxes out of paper cups:
- A basket favor box out of paper cups. (Easy and we use only a cup!)
- Folded gift box from a paper cup.
- A treat box from a paper cup and cupcake wrapper.
- Favor box from a paper cup and ribbon.
- A treat box from a plastic cup and a party hat.
- The treat box looks like a small purse.
1. How To Make Easy And Cute Basket Favor Boxes Out Of Paper Cups

This method is how to make easy favor boxes out of paper cups in the shape of baskets. We need just paper cups to make these favor boxes! It looks to me like a basket and I call it a favor basket. So easy to make!
We Need:

Disposable paper cups
Scissors
How To:
- Cut off the top. This will be the handle for our treat basket.

2. Fold in half of the top of the cup as I show in the photo.

3. I use scissors to smooth the fold.

4. Fold another half. Now we have a box made, it is easy to open and close.

5. Place candies or other snacks inside the box.

6. Place the removed ring inside and close both sides.

7. The ring makes a perfect cute handle for the basket. I pick up the basket with 3 large candies inside and the handle “ring” holds very well it. Of course, we can also dress it up with a small bow.
We can add clear tape for extra security under the bow.

2. Folded Gift Box From Paper Cup
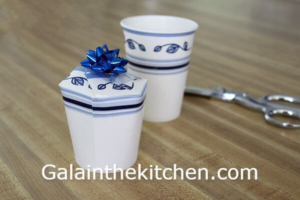
Gift box for a small gifts or treats we can make easy from a disposable paper cup. It is a great idea for a project to make with kids! We can place candies, a cupcake, or other sweets inside the box and surprise loved ones. This is an easy paper cup craft and fun to do with kids!
We Need:
Paper cups
Scissors
Bow
How To Make:
1. Cut off the edge of the cup.
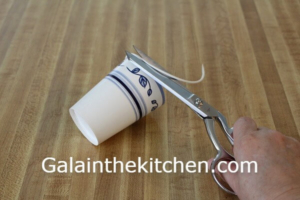
2. Make 6 cuts one inch deep.
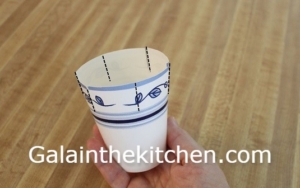
3. Bend each cut towards the center of the cup. Make sure the box closes well and then fill it with sweets and close again.
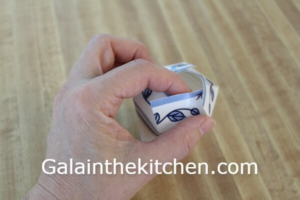
4. On the center will be a small hole but we cover it with a bow.

I placed the bow with sticky tape on the bottom. We can also make a homemade bow and stick it to the top with double sided tape or with glue.
*We can use plastic cups as well to make the treat box.

3. How To Make A Cute Treat Box From Paper Cup And Cupcake Wrapper

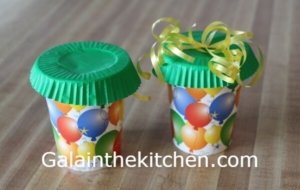
A super simple idea is how to make a cute treat box from a paper cup and cupcake wrapper. Not much effort at all but so cute and colorful treat box in less than a minute! Another creative way is what we can make from paper cups. Just take a look!
We Need:

- Paper cup
- Cupcake wrapper
- Glue stick
- Ribbon
- Double side tape
How To:
- Glue the top of the cup. Flatten the cupcake wrapper.
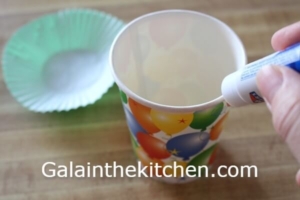
2. Place candies or other sweets in the cup.

3. Place the cupcake liner on the top of the cup. Press the cupcake liner, so it glues well with the cup edge.
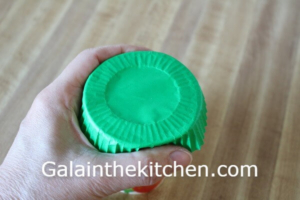
Decorate with a bow on the top and our box is ready. Another easy DIY small gift box idea. So easy and so cute!
4. How To Make A Favors Box From Paper Cup And Curling Ribbon

This party favor box idea is perfect for small items if you are going to use 9 fl oz (226 ml) paper cups to make boxes. We can fit a few candies in this treat box or other small size treats. This treat box has an interesting shape and looks so cute!
We Need:

- Paper cups
- Scissors
- Ribbon
- One-hole paper puncher (optional)
A paper puncher is not necessary to have but looks will be much better. I check the price for one hole simple puncher online when making this page, and prices start from $0.98. You can make holes with other objects but the result with puncher looks will be more presentable. For example, we can use candy apple wooden sticks, or skewers to make holes for the ribbon.
How To:
- Cut the top of the cup off.

2. Pinch out two holes, we can do it in one step.
*If we want to make purse, make 4 holes instead of two. How to make handles from a ribbon check the below technique N5.

3. Make 2 folds inside the cup as I show in the photo. Our cup looks like a small purse.

4. Place candies or other treats in the treat box. Get the ribbon through the holes from the outside and tie the double knot.

5. Then curl the ribbon or make a bow.
To curl the ribbon we need curling ribbon and scissors. Place the dull side of the scissors on the ribbon. Press the scissors on the ribbon and slide the scissors.

5. How To Make A Treat Box From Plastic Cups And Party Hats
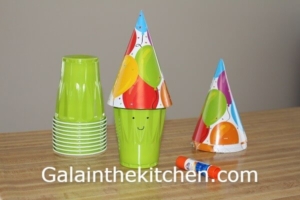
An easy and fun idea in one step how to make party favor containers with lids from plastic cups and party hats. We can buy hats at dollar stores, Walmart, or “Party City” stores. To make the lid for my treat box on the photo I used Birthday celebration party hats with balloons on them from a dollar store. My hat looks good with a solid color cup but we can find many other variations depending on your party theme. Making the favor boxes yourself also allows us to easily customize them for our needs.
We Need:
Party hats
Disposable cups
Glue stick
*We can use instead of glue stick double sided tape.
How To:
- Place candies or other treats in the cup. Glue the edge of the cup and cover the cup with the hat.

2. I drove the cute smiley face with a black marker to give my treat box a personality. So easy and fun!

6. How To Make A Treat Box In The Shape Of Purse Out Of Plastic Cups

It is so easy how we can make a treat box looks like a small purse out of a disposable cup. We can place small toys or sweets in these cute small treats purses. I am going to show two ways to make handles for the purses and other tips. How to start making the purse you can see in technique N3 and it is no reason to repeat it here the difference is instead of pinching out 2 holes we make 4.
The first method to make handles for the purse is my favorite because we need to tie just one knot. The second method to make handles need more effort but less ribbon to make handles and the ribbon will be not on the way when someone opens the purse.
We Need:

Disposable cups
Ribbon
Scissors
Single hole punch
*Instead of ribbon, we can use also fine twine rope.
How To:
- Make 4 holes with the punch on the sides. Make sure you have slightly more ribbon than you need, so you have some left to cut.

2. Tie the ribbon.
*Make sure you read tips about how to stop ribbon fraying on the bottom of the page.

3. Pull the purse’s handles. Our disposable cup look like real tiny purse with handles.

4. To keep handles together I used Scotch double sided tape.

How To Make Treat Purses Handles Another Way
Making handles this way for the purse is slightly different and needs more effort. We need to tie 4 knots instead of one. It is the same way as made handles for gift bags from the store. This method works better than the first one if you like the handles inside the purse to be on the sides and the ribbon is not on the way when filling the purse with treats. Also, we need to use less ribbon to make these handles. Place the ribbon inside the holes as in the photo and make 2 knots. The ribbon loop looks like a handle when we pull the ribbon out from the outside.
We can also add small tissue paper inside the bag for fun and realistic looks like real gift bags.

How To Stop The Ribbon Fraying
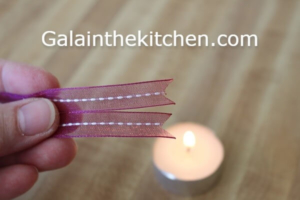
To prevent fraying the edges of the ribbon we need to cut the ribbon in the shape of the letter V. The second step is to seal the ribbon ends with a lighter or candle. It only works if the ribbon is made out of synthetic material. Synthetic material melts when burning and natural fabric burns to ashes.
*Another method to prevent fabric fraying is to use nail polish or special sewing glue. Just apply nail polish or sewing glue on the end of the ribbon and it stops fraying the edges. This works with both materials natural and synthetic.

⇓ Check Out My Other Recipes ⇓

 Recommended ⇒ How To Make Orange Peel Candles With 2 Food Ingredients
 Recommended ⇒ 9 Easy Ideas How To Cut Cantaloupe Fancy For A Summer Party
 Recommended ⇒ 13 Ways To Use Aluminium Foil In The Kitchen
 Recommended ⇒ 5 Easy DIY Cookie Cutters Ideas Out Of Plastic Bottle
 Recommended ⇒ 11 Ways To Use Baking Parchment Paper In The Kitchen
 Recommended ⇒ 5 Clever Uses for Paper Cupcake Liners Besides Baking
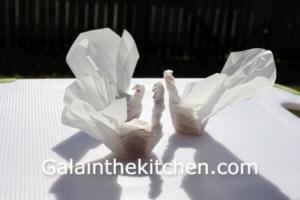 Recommended ⇒ 5 Ways How To Wrap Homemade Candies In Wax Paper And More
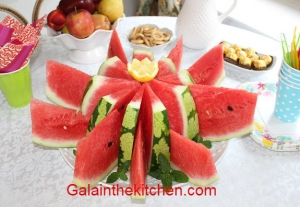 Recommended ⇒ 5 Easy Ideas How To Cut Fancy A Watermelon For a Party
 Recommended ⇒ 3 Fancy And Clever Ways How To Organize And Store Plastic Bags
 Recommended ⇒
 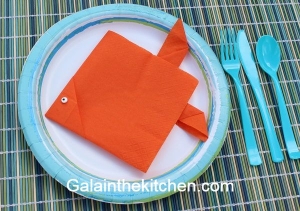 Recommended ⇒ 5 Easy Fish Shape Paper Napkin Folding Ideas.
 Recommended ⇒ 7 Easy Flower From Pepper Garnish Ideas
 Recommended ⇒ 3 Ways How To Make Lemon Covers For Squeezing
 @Galainthekitchen.com
 @Galainthekitchen.com

 @Galainthekitchen.com
 @Galainthekitchen.com
 @Galainthekitchen.com
Leave a Reply
Want to join the discussion?Feel free to contribute!